
Ebi Fry (エビフライ)
Ebi Fry, or panko fried shrimp, is a dish beloved by children across Japan, and it’s often included as an option for teishoku meal sets and bento box lunches. To be perfectly honest, among all the delicious Japanese shrimp recipes , I never really cared much for Ebi Fry. But while testing different techniques to develop this recipe, I found a winning combination that produces plump, juicy fried shrimp with the perfect ratio of ultra-crispy crust. Here are my tricks for the best Ebi Fry!
- Ebi Fry (エビフライ)
- Why My Recipe Works
- Ingredients for Ebi Fry
- How to Clean and Prepare the Shrimp
- How to Make Ebi Fry
- Other Shrimp Recipes
- 📖 Recipe
- FAQ
- Comments
Why My Recipe Works
- Dry brining the shrimp with baking soda and salt before washing it not only firms up the shrimp’s texture, it also eliminates any unpleasant shrimpy odors.
- Coating the shrimp with batter before the panko ensures a nice thick, crispy crust that doesn’t go soggy very quickly. It’s also more foolproof than the usual 3-step flour/egg/panko process as it’s harder to end up with bald spots.
- Cutting small slits into the shrimp’s belly and giving its backside a massage keeps them from curling up when you fry them.
- Scraping out the liquid inside the tails prevents them from bursting in the hot oil when you fry the shrimp.
Ingredients for Ebi Fry
- Shrimp - Because the batter coating method results in a thicker crust, I recommend using the largest shrimp you can find for this Ebi Fry recipe to ensure you get a good ratio of crust to shrimp. I used 13/15 black tiger, which means there were 13 to 15 shrimp per pound. These can also be labeled “colossal”.
- Dry Brine - For the dry brine, I like using a combination of baking soda and salt. The baking soda firms up the texture of the shrimp while deodorizing it. The salt seasons the shrimp while drawing out excess moisture.
- Batter - The batter is a combination of egg, water, and flour. Because the size of every egg differs, you may need to add more water or flour to get the right consistency.
- Panko - I’ve used fresh panko , which you can make by removing the crusts from stale sandwich bread, tearing it into pieces, and pulsing it in a food processor until you have some shaggy breadcrumbs. Dried panko from the store will also work.
How to Clean and Prepare the Shrimp
The first thing you need to do is peel and devein the shrimp. I have a detailed tutorial on cleaning shrimp , but there are a few differences for this recipe. The main one is that you want to leave the last segment of the shell and the tail on. This is not only decorative; it gives you something to hang onto when you batter and bread the shrimp. Because we leave the tail on, it’s important to remove the telson (the sharp spike in the center of the tail) as it tends to burst when you put the shrimp in the hot oil.
Then you can work the baking soda and salt into the shrimp using your hand. Let this rest for a few minutes, then rinse the shrimp thoroughly until the water runs clear. This will give your Japanese shrimp a snappy firm texture and clean taste. Drain the shrimp well and use paper towels to dry it off.

To prevent the shrimp from curling, you can make 4-5 slits into each shrimp’s underside at a 45-degree angle. Then, flip them over and press on the backside with your fingers. You should hear a popping noise as the muscle fibers separate, but don’t go overboard here or the shrimp will turn to mush. This is the secret to making your Japanese shrimp look so long and straight.

Finally, you’ll want to use a knife to scrape out any water in the tail. This also creates an opening at the tail tips that will allow steam to escape so they don’t explode when you fry them.

How to Make Ebi Fry
Whisk the egg and water together in a bowl until uniform in color. Add the flour and whisk until the batter is free of lumps. I recommend mixing the batter before you prepare the shrimp, as this gives the gluten in the batter a chance to relax.
Preheat a heavy-bottomed pot with 2-inches of oil to 340 degrees F (170 C).
Grab a shrimp by its tail and dip the unshelled part into the batter to coat it evenly. Let the excess batter drip off, and then transfer the shrimp onto the panko.
Cover the shrimp with panko and then press on it gently to ensure the breadcrumbs adhere well to the shrimp. Repeat the battering and breading steps with the rest of the shrimp.
When the oil is up to temperature, fry the shrimp until the panko is golden brown, flipping them over once in the middle (this took a total of 3 minutes for my shrimp). If your shrimp are smaller, you will want to fry them for a shorter amount of time.
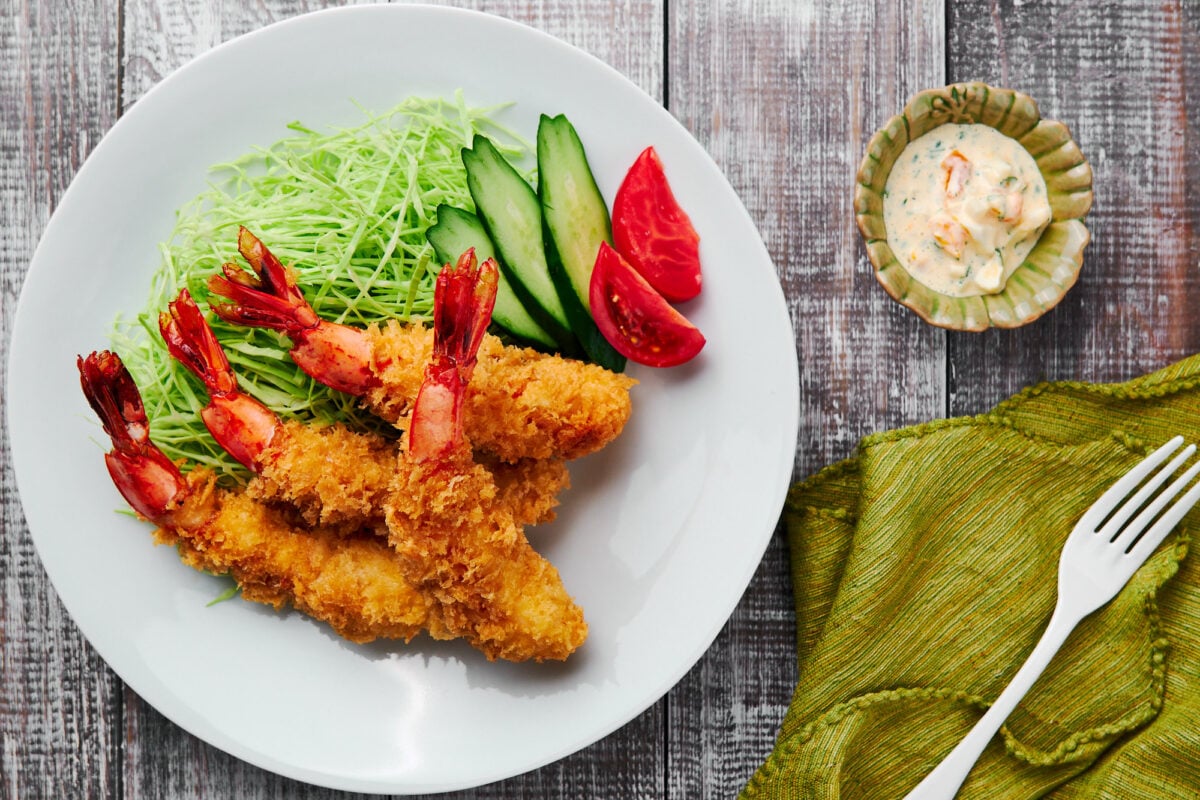
Drain the shrimp on a paper towel-lined rack for a minute and serve with shredded cabbage and tartar sauce or tonkatsu sauce .

Other Shrimp Recipes
- Chawanmushi
- Shrimp Shumai
- Shrimp Fried Rice
- Ebi Chili (Chili Shrimp)
📖 Recipe


Equipment
Units
Ingredients1x2x3x
- 1 egg
- 2 tablespoons water
- 40 grams all-purpose flour (~⅓ US cup)
- 400 grams shrimp (I used 13/15 sized black tiger)
- ½ teaspoon baking soda (for preparing shrimp)
- ¼ teaspoon salt (for preparing shrimp)
- 2 cups panko
- vegetable oil (for frying)
Instructions
- To make the batter, crack the 1 egg into a bowl and add the 2 tablespoons water . Whisk until uniform in color.
- Add the 40 grams all-purpose flour and whisk until smooth and free of lumps. Let the batter rest while you prepare the shrimp.
- See the instructions in the headnotes for cleaning and preparing the 400 grams shrimp using the ½ teaspoon baking soda and ¼ teaspoon salt .
- Preheat a heavy-bottomed pot with two inches of vegetable oil to 340 F (170C). Prepare a cooling rack lined with 3 sheets of paper towels. Add the 2 cups panko to a tray.
- Dip the shrimp in the batter, let the excess batter drip off.
- Set the shrimp onto the bed of panko. Cover the top of the shrimp with more panko and then give it a light press to make sure the breadcrumbs stick to the shrimp. Repeat with the remaining shrimp.
- Fry the shrimp without overcrowding the oil until they are golden brown. Flip them over part of the way through to ensure they brown evenly. This took about three minutes for my shrimp, but it may take more or less time depending on your shrimp’s size.
- Drain the shrimp on the prepared rack and let it cool for one minute before serving.
Nutrition Facts
Ebi Fry is a Japanese fried shrimp dish made by breading shrimp with panko and deep-frying it. Although it’s considered a yōshoku (western cuisine) dish, it’s a popular home-cooked meal in Japan, reflected in pop culture references in manga and anime. Other yōshoku foods include Korokke , Hayashi Rice , and Tonkatsu .
“Ebi” is a two-syllable word, and “fry” is a three-syllable word when pronounced in Japanese as follows: e like e nter bi like bee f hu like who ra the " ra " sound does not exist in the English language, and the best way to make it is to say the word “romp” with the tip of your tongue at the front of your mouth. i like e ven
“Katsu” is a transliteration of the English word “cutlet.” Since shrimp isn’t a cutlet, it’s not katsu. That being said, there is a dish called Ebi Katsu that is made by turning the shrimp into a paste and shaping it into a cutlet before breading and deep-frying it.
In addition to rice and miso soup , Ebi Fry is usually served with sides such as shredded cabbage , Japanese potato salad , or macaroni salad . It can also be served with Japanese curry .
Once it has cooled completely, you can store it on paper towels in a sealed container in the refrigerator. Ebi Fry is great packed into a bento box lunch, and it can be used as a filling for sandwiches. You can also prepare a donburi with it similar to katsudon .
Yes, I have a recipe and video here . Just cut the crusts off of stale sandwich bread and tear it into small pieces.Then you can put these in a food processor and pulse until you have breadcrumbs of the desired size. I usually tend to make them much larger than the packaged panko you can buy. If you don’t have a food processor, you can tear it into breadcrumbs with your hands, but this will take a very long time.

Ebi Fry (Panko Shrimp)
Equipment
- 1 Medium Glass Bowl
- 1 Whisk
- 1 Large Glass Bowl
- 1 breading tray
- 1 cast iron frying pot
- 1 frying tongs
- 1 Draining Rack
Ingredients
- 1 egg
- 2 tablespoons water
- 40 grams all-purpose flour (~⅓ US cup)
- 400 grams shrimp (I used 13/15 sized black tiger)
- ½ teaspoon baking soda (for preparing shrimp)
- ¼ teaspoon salt (for preparing shrimp)
- 2 cups panko
- vegetable oil (for frying)
Instructions
- To make the batter, crack the 1 egg into a bowl and add the 2 tablespoons water . Whisk until uniform in color. 1 egg, 2 tablespoons water
- Add the 40 grams all-purpose flour and whisk until smooth and free of lumps. Let the batter rest while you prepare the shrimp. 40 grams all-purpose flour
- See the instructions in the headnotes for cleaning and preparing the 400 grams shrimp using the ½ teaspoon baking soda and ¼ teaspoon salt . 400 grams shrimp, ½ teaspoon baking soda, ¼ teaspoon salt
- Preheat a heavy-bottomed pot with two inches of vegetable oil to 340 F (170C). Prepare a cooling rack lined with 3 sheets of paper towels. Add the 2 cups panko to a tray. vegetable oil, 2 cups panko
- Dip the shrimp in the batter, let the excess batter drip off.
- Set the shrimp onto the bed of panko. Cover the top of the shrimp with more panko and then give it a light press to make sure the breadcrumbs stick to the shrimp. Repeat with the remaining shrimp.
- Fry the shrimp without overcrowding the oil until they are golden brown. Flip them over part of the way through to ensure they brown evenly. This took about three minutes for my shrimp, but it may take more or less time depending on your shrimp’s size.
- Drain the shrimp on the prepared rack and let it cool for one minute before serving.
